Hunter Pacific Remote Control Instructions: A Comprehensive Guide
Navigating Hunter Pacific ceiling fan remotes can be tricky! This guide offers detailed instructions, troubleshooting, and pairing information, ensuring optimal fan and light control.
Understanding Hunter Pacific Remote Controls
Hunter Pacific remotes are designed for convenient control of your ceiling fan’s speed, lighting, and direction. These controls streamline operation, eliminating the need for wall switches in many cases. However, understanding the nuances of these remotes – particularly the differences between AC and DC models – is crucial for successful setup and troubleshooting.
The Switchem range represents a newer, innovative approach to integrated fan control, offering expanded functionality. Regardless of the model, each remote utilizes specific codes for pairing with the fan, ensuring a secure connection and preventing interference. Proper pairing is essential for responsiveness.
Familiarizing yourself with the handset button explanations, as detailed in the fan’s manual, is also vital. The LED indicator lights provide valuable feedback on the fan’s status and speed settings. Remember to always verify the isolation switch is on, as the remote control won’t function otherwise.
Types of Hunter Pacific Remotes
Hunter Pacific offers a variety of remote controls tailored to different fan models and functionalities. Primarily, remotes are categorized as either AC or DC, corresponding to the type of motor in your ceiling fan. AC remotes are generally compatible with older fan models, while DC remotes are designed for newer, more energy-efficient fans.
The Switchem remote represents a significant advancement, integrating seamlessly with a range of Hunter Pacific fans. These remotes boast a wider range of features and improved responsiveness. Beyond these core types, specific models like those for the Creation v2 fan have unique programming requirements.
Accessories, including replacement remotes and wall controls, are also available. When selecting a replacement, it’s crucial to identify your fan’s model number to ensure compatibility. The number of codes available on a remote (up to 16 for Switchem) dictates how many fans it can potentially control.
AC Remotes vs. DC Remotes
Hunter Pacific utilizes both AC and DC remote control systems, each designed for specific fan motor types. AC remotes, typically found with older models, operate using alternating current and generally offer basic functionalities like speed control and light operation. They often rely on radio frequency (RF) signals for communication.
DC remotes, conversely, are engineered for newer DC motor fans, prioritizing energy efficiency and advanced features. These remotes utilize direct current and often include functionalities like precise speed adjustments, timer settings, and potentially, smart home integration. DC remotes generally have a more extensive range of programmable codes.
A key difference lies in compatibility; an AC remote will not function with a DC fan, and vice versa. Identifying your fan’s motor type is crucial when replacing a lost remote. Product Downloads on the Hunter Pacific website provide detailed specifications for each model, clarifying remote compatibility.
Switchem Remote Control Overview
Switchem represents Hunter Pacific’s innovative range of integrated ceiling fan remote controls. Designed for ease of use and enhanced functionality, Switchem remotes streamline fan operation, offering comprehensive control over speed, lighting, and other features. These remotes boast a sleek design and intuitive button layout.
A significant advantage of Switchem is its multi-fan capability. Each remote can store up to 16 unique codes, allowing a single handset to control multiple compatible fans within a home or commercial space. This eliminates the need for numerous remotes, simplifying control and reducing clutter.
The HANDPIECE features clear LED indicator lights that display the fan’s current speed setting. Understanding these indicators is key to efficient operation. Switchem remotes are designed to be user-friendly, but consulting the specific fan’s manual is always recommended for optimal performance.
Initial Setup and Pairing
Proper setup is crucial for seamless control! Ensure correct battery installation, power on both the fan and remote, and follow the general pairing steps for operation.
Checking Battery Installation
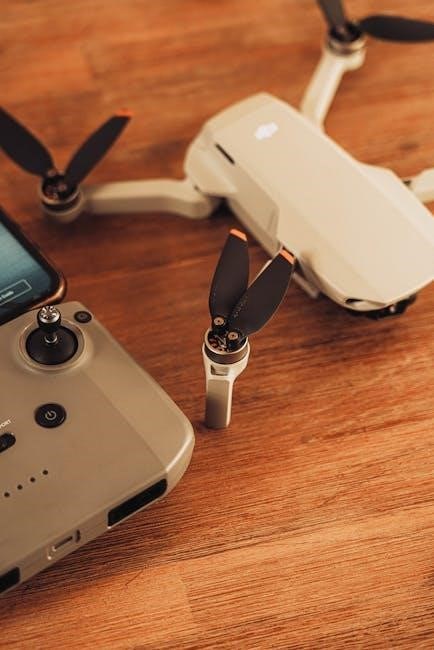
Ensuring correct battery installation is the first step towards a functioning Hunter Pacific remote. Most Hunter Pacific remotes require AAA or AA batteries, though the specific type will be indicated on the remote itself or in the fan’s manual. Begin by locating the battery compartment, typically on the back or bottom of the remote handset. Gently slide or pry open the compartment cover.
Insert the batteries, paying very close attention to the polarity markings (+ and -) inside the compartment. Incorrect polarity can prevent the remote from working and may even damage it. Once the batteries are securely in place, close the battery compartment cover, ensuring it clicks or locks shut. A loose cover can interrupt the connection;
Test the installation: After inserting the batteries, attempt to operate the remote. If it doesn’t respond, double-check the polarity and ensure the batteries are fresh and making good contact. Weak or old batteries are a common cause of remote control issues.
Powering On the Fan and Remote
Before attempting to pair or operate your Hunter Pacific remote, ensure both the fan and the remote itself are properly powered on. Begin by verifying the fan’s power supply. Confirm the wall switch controlling the fan is in the “on” position. The fan doesn’t necessarily need to be spinning, but it must receive power to communicate with the remote.
Next, activate the remote. As discussed previously, ensure fresh batteries are correctly installed with the proper polarity. Pressing any button on the remote should, ideally, trigger a small indicator light (if equipped), confirming the remote has power. If no light appears, revisit the battery installation step.
Important Note: Some Hunter Pacific fans require the isolation switch to be on for the remote control to function correctly. Refer to your fan’s manual for specific power-on requirements. A stable power connection is crucial for successful pairing and operation.
General Pairing Steps
Pairing your Hunter Pacific remote to the fan establishes communication for control. While specific steps vary by model, a common procedure exists. Begin with the fan powered off at the wall switch, then turn it back on. Within 60 seconds of powering on the fan, quickly press and hold the pairing button on the remote – often located inside the battery compartment or clearly marked on the handset.
Simultaneously, or immediately after, locate the pairing button on the fan itself (consult your fan’s manual for its exact location). Press and hold this button. The fan may blink or emit a signal indicating it’s in pairing mode. Continue holding both buttons until the fan light flashes or the fan briefly turns on and off, signifying a successful pairing.
Always refer to your fan’s manual for exact pairing instructions, as these steps can differ. If pairing fails, repeat the process, ensuring buttons are pressed simultaneously and within the specified timeframe.
Pairing Specific Models (Creation v2)
The Hunter Pacific Creation v2 ceiling fan requires a specific pairing sequence. Begin by ensuring the fan is powered off at the wall switch, then turn the power back on. Within the first 60 seconds of power-up, locate the pairing button on the remote control – it’s typically found inside the battery compartment.
Press and hold the pairing button on the remote. Simultaneously, access the receiver unit within the fan’s canopy. Locate the small pairing button on the receiver module and press and hold it as well. Continue holding both buttons until the fan blades perform a short rotation or the fan light flashes rapidly, confirming successful synchronization.
To program the remote for your Creation v2, this simultaneous button press is crucial. If unsuccessful, repeat the process, verifying the buttons are held during the initial 60-second window after power-on. Refer to the official Hunter Pacific documentation for visual aids.

Remote Control Functions
Hunter Pacific remotes offer intuitive control. Adjust fan speeds, dim or brighten lights, reverse the fan’s direction for seasonal comfort, and set convenient timer schedules.
Speed Control
Adjusting fan speed is a core function of your Hunter Pacific remote. Most remotes feature dedicated buttons to cycle through available speeds – typically Low, Medium, and High. The number of LEDs illuminated on the remote handset often visually indicates the current speed setting; for instance, one LED signifies low speed, while multiple LEDs represent higher speeds.
Pressing the speed button repeatedly will step through each available speed level. Some models may offer a ‘natural breeze’ or ‘sleep mode’ function, simulating fluctuating air currents for enhanced comfort. These modes are usually activated via a specific button or a combination of button presses. Ensure the fan motor is fully stopped before changing speeds rapidly to prevent potential strain. Remember to consult your specific fan model’s manual for detailed speed control instructions, as variations may exist between different Hunter Pacific remote designs.
Light Control
Hunter Pacific remotes provide convenient control over your ceiling fan’s integrated lighting. A dedicated light button typically toggles the light on and off with each press. Many remotes also feature dimming capabilities, allowing you to adjust the brightness level to suit your preference. Dimming is usually controlled by holding the light button or using separate dimming buttons (+/-).
Some advanced remotes offer color temperature control, enabling you to switch between warm white, cool white, and daylight settings. If your fan utilizes LED bulbs, ensure compatibility with the remote’s dimming function to avoid flickering or premature bulb failure. If the light isn’t responding, check the bulb itself and ensure it’s securely installed. Refer to your fan’s manual for specific light control features and troubleshooting steps related to your particular model.
Fan Direction Control (Summer/Winter)
Hunter Pacific remotes often include a dedicated button to control the fan’s direction – a crucial feature for year-round comfort. In summer, the fan should rotate counter-clockwise, creating a downward airflow that produces a cooling breeze. Conversely, in winter, set the fan to rotate clockwise at a low speed. This gently circulates warm air trapped near the ceiling, improving heating efficiency and reducing energy costs.
The remote’s fan direction button typically toggles between these two settings with each press. Ensure the fan is completely stopped before changing direction to prevent motor damage. Some models may display an indicator light to confirm the current direction. Regularly adjusting the fan direction optimizes comfort and minimizes energy consumption throughout the seasons. Consult your fan’s manual for specific instructions and safety precautions related to direction control.
Timer Functionality
Many Hunter Pacific remotes feature a timer function, allowing for convenient automated fan operation. This is incredibly useful for energy saving and ensuring comfort without manual intervention. Typically, the timer button cycles through various preset intervals – commonly 1, 2, 4, and 8 hours – with each press. Some advanced models may offer more granular timer settings, allowing you to specify a precise shut-off time.

Once a timer is set, the fan will automatically turn off after the selected duration. The remote may display a timer indicator light while the function is active. Remember to check your specific model’s manual for detailed instructions on utilizing the timer feature, as button layouts and functionalities can vary. Utilizing the timer function promotes energy efficiency and provides a comfortable environment tailored to your schedule.
Troubleshooting Common Issues
Experiencing problems with your Hunter Pacific remote? This section addresses frequent concerns like unresponsive remotes, fan connectivity, and light malfunctions, offering practical solutions.
Remote Not Responding
If your Hunter Pacific remote control isn’t responding, begin with the simplest checks. First, ensure fresh batteries are correctly installed, paying attention to polarity. Sometimes, even new batteries are faulty, so testing with a known working set is advisable. Confirm the isolation switch powering the fan is turned on; the remote won’t function without power to the fan itself.
Next, verify there’s no obstruction between the remote and the fan receiver. Direct line of sight isn’t always necessary, but significant interference can cause issues. Try moving closer to the fan. If the problem persists, attempt a remote reset – consult your fan’s manual for specific reset procedures, as they vary by model.
Consider potential interference from other devices. Finally, if none of these steps resolve the issue, the remote itself may be defective and require replacement. Refer to the Hunter Pacific website for compatible replacement remotes and purchasing options.
Fan Not Responding to Remote
When your Hunter Pacific fan doesn’t react to the remote, despite the remote appearing functional, several factors could be at play. Begin by re-pairing the remote to the fan. This is often necessary after power outages or battery replacements. Refer to the “Pairing Specific Models” section of this guide, or your fan’s manual, for detailed instructions – the process differs between AC and DC models.
Ensure the fan’s receiver is properly connected and receiving power. A loose connection can prevent communication. Check the wiring within the fan canopy. If pairing fails repeatedly, reset both the remote and the fan following the manufacturer’s instructions.
Confirm you’re using the correct remote code for your fan model. The Switchem remote, for example, requires code selection. Finally, if the issue persists, a faulty fan receiver might be the cause, necessitating professional assistance or component replacement.
Light Not Working
If your Hunter Pacific fan spins but the light remains dark, start with the simplest checks. Verify the light bulb is securely screwed in and hasn’t burned out. Try a known working bulb to eliminate this possibility. Next, confirm the light function is activated on the remote – accidentally pressing the ‘off’ button is a common oversight.
If the remote appears to be functioning correctly, investigate the receiver unit within the fan canopy. Ensure all wiring connections are secure. A loose wire can interrupt power to the light. Some models have a separate connection for the light; double-check this.
Consider if the light is dimmable and if the remote’s dimmer function is properly configured. If issues persist, re-pairing the remote might resolve communication errors. If none of these steps work, a faulty light kit or receiver may require replacement.
Pairing Issues and Resetting the Remote
Encountering difficulties pairing your Hunter Pacific remote? Begin by ensuring the fan has power and is within a reasonable distance of the receiver. A common solution involves a remote reset. Typically, this entails removing the batteries, waiting approximately 30 seconds, and then reinserting them. This clears any previous pairings.
Next, attempt the pairing process again, following the specific instructions for your fan model (refer to your manual!). Some models require holding a specific button combination on the remote while powering on the fan. If pairing continues to fail, check for interference from other devices operating on similar frequencies.
As a last resort, a factory reset of the receiver unit within the fan canopy might be necessary. This usually involves a specific sequence of power cycles. Consult your fan’s manual for detailed instructions, as procedures vary significantly between models.
Advanced Features & Codes
Explore Switchem’s 16 unique codes for multi-fan control! Understand LED indicators displaying fan speed, and delve into remote programming for customized operation.
Understanding Remote Codes
Hunter Pacific’s Switchem remotes utilize a system of codes to allow for operation across multiple fans within a single space. Each remote can store up to 16 distinct codes, enabling independent control of each fan without interference. This is particularly useful in environments with numerous ceiling fans, such as commercial spaces or large homes.
The process of assigning a code involves entering a specific sequence of button presses on the remote itself. It’s crucial to consult your fan’s manual for the exact code entry procedure, as it can vary slightly between models. Once a code is assigned, the remote will only communicate with the fan programmed to that specific code.
If you encounter issues with remote functionality, verifying the correct code assignment is a primary troubleshooting step. Incorrect or duplicated codes can lead to erratic behavior or a complete lack of response from the fan. Remember to document the codes assigned to each fan for easy reference and future adjustments.
Using the Switchem Remote with Multiple Fans
The Switchem remote, a hallmark of Hunter Pacific innovation, excels in managing multiple fans simultaneously. Its core strength lies in its ability to store up to 16 unique codes, allowing individual control over each fan installed. This feature eliminates the need for multiple remotes, streamlining operation and reducing clutter.
To utilize this capability, each fan must be assigned a distinct code during the pairing process. Refer to your fan’s specific manual for detailed instructions on code assignment. Once programmed, the remote can cycle through these codes, directing commands to the corresponding fan.
Careful code management is essential. Avoid assigning duplicate codes, as this will cause conflicts and unpredictable behavior. Maintaining a clear record of which code is assigned to each fan will simplify troubleshooting and future adjustments. The Switchem remote truly offers a convenient solution for comprehensive fan control.
LED Indicator Lights Explained
The Switchem remote features six LED indicator lights, providing valuable feedback on the fan’s current operational status. These lights aren’t merely decorative; they visually represent the selected fan speed. A single illuminated LED on the far left signifies the lowest speed setting, while progressively more lights illuminate as the speed increases.
Therefore, if three LEDs are lit, the fan is operating at the medium speed. This visual cue allows for quick and easy confirmation of the chosen speed without needing to observe the fan blades directly. Beyond speed indication, the LEDs can also signal pairing mode or potential communication issues.
A flashing LED might indicate a failed pairing attempt or a weak signal. Refer to the troubleshooting section of your manual for specific interpretations of LED behavior. Understanding these indicators empowers users to diagnose and resolve common issues efficiently, maximizing their Hunter Pacific fan experience.
Finding Manuals and Support
Locate essential resources easily! Hunter Pacific offers downloadable manuals, model number guides, online support, and direct customer service for remote assistance.
Hunter Pacific Product Downloads
Access a wealth of documentation directly from Hunter Pacific’s website. They provide a dedicated section for product downloads, categorized for easy navigation. You’ll find manuals specifically for DC fans, including previous models, and separate sections for AC fans and accessories.
Remote control manuals are readily available, alongside documentation for wall controls and even discontinued products. This comprehensive archive ensures you can find the right information for your specific fan model, regardless of its age.
Before downloading, it’s crucial to identify your fan’s model number, typically found on a sticker located on the fan motor housing. Having this information will streamline the search process and guarantee you download the correct manual. The downloads include detailed instructions, wiring diagrams, and troubleshooting guides, empowering you to resolve issues independently or prepare for professional assistance.
Locating Your Fan’s Model Number
Identifying your Hunter Pacific fan’s model number is paramount when seeking support, downloading manuals, or ordering replacement parts. This unique identifier ensures you receive information tailored to your specific fan’s features and functionality.
The model number is typically printed on a sticker affixed to the fan motor housing. This sticker is often located on the exterior of the motor, visible without disassembling the fan. Carefully inspect the motor housing, looking for a label containing alphanumeric characters – this is your model number.
It’s essential to record the complete model number, including any letters or numbers, as even a slight variation can lead to incorrect information. Having this number readily available will significantly expedite the process of finding the correct documentation or assistance from Hunter Pacific’s customer support team. Tip: include the full model number when contacting support!
Accessing Online Support Resources
Hunter Pacific offers a wealth of online resources designed to assist customers with their ceiling fan and remote control needs. Their official website serves as a central hub for accessing manuals, troubleshooting guides, and frequently asked questions.
The “Product Downloads” section is particularly valuable, allowing you to download specific manuals based on your fan’s model number. These manuals provide detailed instructions on pairing remotes, operating various functions, and resolving common issues.
Beyond downloadable manuals, Hunter Pacific’s website often features helpful articles and videos demonstrating remote control setup and troubleshooting steps. Explore their support pages for solutions to common problems like unresponsive remotes or pairing difficulties. Utilizing these resources can often resolve issues quickly and efficiently, saving you time and effort. Don’t hesitate to leverage the available online support!
Contacting Hunter Pacific Customer Support
If online resources don’t resolve your Hunter Pacific remote control issue, direct customer support is readily available. Hunter Pacific understands that sometimes personalized assistance is necessary, especially with complex pairing or functionality problems.
Their website provides contact details, typically including a phone number and email address for reaching their support team. When contacting support, be prepared to provide your fan’s model number – this crucial piece of information allows them to offer tailored assistance.
Clearly describe the issue you’re experiencing with your remote, including any troubleshooting steps you’ve already taken. Detailed information helps the support team diagnose the problem efficiently. Expect knowledgeable representatives who can guide you through advanced troubleshooting or offer solutions specific to your fan model. Don’t hesitate to reach out for expert help!