Maintaining your manual transmission’s fluid is crucial for smooth operation and longevity, ensuring optimal performance and preventing costly repairs down the road.
Regular checks help identify potential issues early, safeguarding the gearbox—a vital component scaling engine power for varied driving conditions.
Why Checking is Important
Consistent monitoring of manual transmission fluid levels is paramount for several reasons. The gearbox, responsible for translating engine power, demands proper lubrication to function efficiently and avoid premature wear. Neglecting fluid checks can lead to grinding gears, difficulty shifting, and ultimately, complete transmission failure – a significantly expensive repair.
Regular inspections allow for early detection of leaks or contamination, preventing further damage. Maintaining the correct fluid level ensures smooth power transfer, enhancing driving experience and preserving the vehicle’s overall value. Proactive checks are a simple yet effective preventative maintenance step.
Frequency of Checks
Ideally, manual transmission fluid should be checked every 30,000 miles or with each oil change, whichever comes first. However, this frequency can vary based on driving conditions and vehicle usage. For those who frequently tow, drive in harsh environments, or engage in spirited driving, more frequent checks – perhaps every 15,000 to 20,000 miles – are recommended.
Always inspect the fluid if you notice any unusual noises, difficulty shifting, or signs of leaks. Consistent monitoring, even outside scheduled intervals, is a proactive approach to maintaining transmission health and preventing costly repairs.

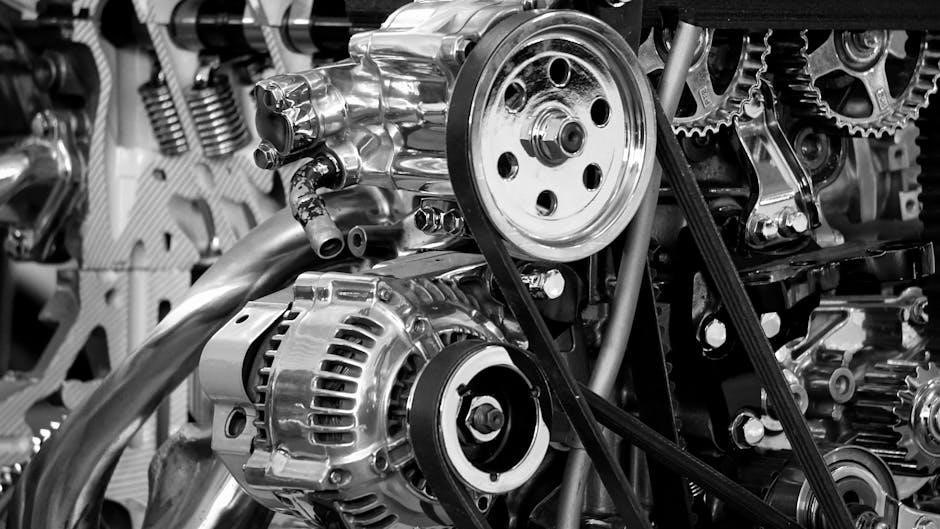
Understanding Manual Transmission Fluid
Manual transmission fluid lubricates gears and synchronizers, ensuring smooth shifting and preventing wear. Its condition directly impacts gearbox performance and longevity.
Types of Manual Transmission Fluid
Historically, many manual transmissions used gear oil, often GL-4 or GL-5 rated. However, modern vehicles increasingly utilize specific, often proprietary, fluids. These can range from mineral oil-based to synthetic formulations, each designed for specific transmission designs and performance requirements.
Older vehicles frequently tolerate GL-4 gear oil, while newer ones often require a specific fluid to avoid compatibility issues and damage. Using the incorrect fluid can lead to corrosion, poor shifting, and ultimately, transmission failure. Always consult your vehicle’s owner’s manual or a trusted repair source to determine the correct fluid type for your specific make and model.
Fluid Color and Condition as Indicators
Healthy manual transmission fluid typically appears amber or light brown; As it ages and accumulates contaminants, the color darkens to a reddish-brown or even black. A burnt smell is a strong indicator of overheating and fluid breakdown, signaling potential internal damage.
Metallic flakes within the fluid suggest gear wear. A milky or cloudy appearance indicates water contamination. These visual cues, combined with the fluid’s smell, provide valuable insights into the transmission’s health, often revealing issues before they become major problems requiring extensive repairs.

Locating the Fill and Check Plugs
Identifying the fill and check plugs is essential for accurate fluid level assessment; their locations vary by vehicle, often found on the transmission’s side or bottom.
Identifying the Fill Plug
The fill plug is typically larger than the check plug and often requires a specific wrench or socket size for removal. It’s usually positioned higher on the transmission case, allowing fluid to be added via gravity or a pump. Locating it can sometimes be challenging due to its placement and potential obstructions. Consult your vehicle’s repair manual or online resources specific to your make and model for precise location details. Identifying the correct plug prevents damage and ensures proper fluid addition, maintaining optimal transmission performance and preventing potential issues.
Identifying the Check Plug
The check plug is generally smaller than the fill plug and is used to determine the fluid level within the transmission. It’s often located on the side of the transmission case, sometimes requiring a bit of searching due to its positioning. Removing this plug allows you to visually inspect and feel the fluid level. Accurate identification is vital; mistaking it for the fill plug can lead to incorrect fluid checks and potential transmission damage. Refer to your vehicle’s documentation for precise location guidance.

Tools Needed for the Check
Essential tools include wrenches or sockets matching the plug sizes, and a fluid transfer tool like a syringe or pump for accurate additions or removals.
Wrenches and Sockets
Having the correct wrenches and sockets is paramount for accessing the fill and check plugs without damaging them. These plugs often require specific sizes, varying between vehicle makes and models. A set of both metric and standard sizes is highly recommended to ensure compatibility.
Consider using a six-point socket instead of a twelve-point, as it provides a more secure grip and reduces the risk of rounding off the plug’s corners. Penetrating oil can be invaluable if the plugs are corroded or stuck, aiding in their removal.
Fluid Transfer Tools (Syringe or Pump)
Precisely adding fluid, if needed, necessitates a fluid transfer tool. A large-capacity syringe with a flexible hose, or a small hand pump designed for automotive fluids, works exceptionally well. These tools allow for controlled fluid delivery, minimizing spills and ensuring accurate levels.
Avoid pouring directly from the fluid container, as it’s prone to overfilling. The syringe or pump enables you to incrementally add fluid, monitoring the level through the check plug until it reaches the correct height, preventing damage.

Step-by-Step Checking Procedure
Begin by preparing the vehicle, then carefully remove the check plug to inspect the fluid level, ensuring accuracy for optimal gearbox function and performance.
Preparing the Vehicle
Before initiating the check, ensure the vehicle is parked on a level surface to guarantee an accurate fluid level reading. Allow the engine and transmission to warm up slightly; however, avoid checking when excessively hot, as this poses a burn risk. Engage the parking brake firmly for safety, and if necessary, use wheel chocks for added security. Locate the fill and check plugs – their positions vary by vehicle model – consulting your owner’s manual is highly recommended. Gathering necessary tools, like wrenches and a fluid transfer tool, will streamline the process, making it efficient and safe.
Removing the Check Plug
Carefully locate the check plug, typically positioned on the side of the transmission. Using the appropriate wrench or socket, slowly begin to loosen the plug. Be prepared for a small amount of fluid to potentially seep out, so have a rag readily available to wipe up any spills. Once loosened, fully remove the check plug, observing the fluid level. The fluid should be level with the bottom of the plug’s opening; this indicates the correct amount. Note the fluid’s color and consistency, as these are indicators of its condition.
Checking the Fluid Level
With the check plug removed, assess the fluid level within the transmission. Ideally, the fluid should be right at the base of the check plug opening – this signifies the correct fill level. If the fluid is below this point, it indicates a low level requiring attention. Conversely, if fluid overflows when checking, it suggests an overfilled condition. Carefully observe the fluid’s color and consistency; clear, honey-colored fluid is generally good, while dark or murky fluid signals potential contamination or degradation;
Adding Fluid if Necessary
Ensure you use the manufacturer-recommended fluid type, adding it slowly and carefully via the fill plug to avoid overfilling and maintain proper gearbox function.
Using the Correct Fluid Type
Selecting the appropriate manual transmission fluid is paramount; using the wrong type can lead to significant damage. Consult your vehicle’s owner’s manual or a reliable repair resource to identify the exact specification required for your specific make and model.
Different transmissions demand different fluids – some require GL-4 gear oil, while others necessitate GL-5 or even specialized synthetic fluids. Incorrect fluid viscosity or additive packages can cause premature wear, shifting problems, and ultimately, transmission failure.
Always prioritize using a fluid that meets or exceeds the manufacturer’s standards to guarantee optimal performance and protect your investment.
Adding Fluid Slowly and Carefully
When topping off your manual transmission fluid, proceed with caution to avoid overfilling. Use a fluid transfer tool, like a syringe or pump, for precise control and minimize spills. Add fluid in small increments, frequently rechecking the level with the dipstick or check plug.
Overfilling can create excessive pressure, leading to leaks and potential damage to seals. It’s better to slightly underfill and recheck after a short drive than to risk overpressurization.
Ensure the fluid is added slowly to allow it to settle and provide an accurate reading.
Potential Problems and What They Indicate
Low fluid levels cause grinding gears, while contaminated fluid—indicated by a metallic sheen—signals internal wear and potential transmission damage requiring immediate attention.
Low Fluid Level Issues
A diminished fluid level within the manual transmission can manifest in several concerning ways, directly impacting driving experience and potentially leading to significant mechanical damage. Drivers may experience difficulty shifting gears, particularly noticeable when attempting to engage first or reverse.
Grinding or clunking noises during gear changes are strong indicators of insufficient lubrication, as metal components are making contact without adequate separation. Prolonged operation with low fluid can accelerate wear on gears, bearings, and synchronizers, ultimately resulting in costly repairs or complete transmission failure. Addressing low fluid promptly is vital for preserving gearbox health.
Contaminated Fluid Signs
Identifying contaminated manual transmission fluid is crucial, as it compromises lubrication and cooling, accelerating wear and tear. Look for a dark, murky color, a burnt smell, or the presence of metal shavings – all indicators of internal damage or degradation.
Fluid containing debris suggests gear or bearing failure, while a milky appearance points to water intrusion, potentially causing corrosion. Contamination reduces the fluid’s ability to protect components, leading to rough shifting, noise, and eventual transmission malfunction. Regular checks and timely fluid changes are essential.

Common Manual Transmission Types
Manual transmissions vary by drivetrain; front-wheel drive are common, while rear-wheel drive systems often require different fluid types and checking procedures.
Front-Wheel Drive Transmissions
Front-wheel drive manual transmissions are prevalent in many vehicles, often featuring a simpler layout for fluid checks. Typically, locating the fill and check plugs involves accessing them from beneath the vehicle, potentially requiring ramps or a jack for safe access. These transmissions frequently utilize a side-mounted fill plug, allowing for fluid addition using a pump or syringe. Checking the fluid level usually involves removing a check plug and verifying the fluid reaches the designated opening, ensuring proper lubrication and preventing gear damage.
Rear-Wheel Drive Transmissions
Rear-wheel drive manual transmissions often present a slightly more complex fluid check procedure. Accessing the fill and check plugs typically requires lifting the vehicle for undercarriage access, prioritizing safety with jack stands. These transmissions may have fill and check plugs positioned on the transmission’s side or bottom. Checking fluid levels involves removing the check plug while the transmission is warm, verifying fluid reaches the opening. Proper fluid levels are vital for smooth shifting and preventing premature wear in these systems.

Safety Precautions
Always support the vehicle securely with jack stands, and exercise caution when handling hot fluids to avoid burns during the checking process.
Working with Hot Fluids
Transmission fluid operates at high temperatures after driving, posing a burn risk. Allow sufficient cooling time before attempting any checks or removal of plugs. Wear appropriate protective gear, including gloves and eye protection, to shield against splashes. If immediate access is needed, carefully use a rag or towel to handle hot components.
Be extremely cautious when draining fluid, directing it into a suitable container away from your body and the vehicle’s paint. Hot fluid can cause severe injuries, so prioritize safety throughout the entire process.
Vehicle Support and Stability
Always ensure the vehicle is parked on a level surface and securely supported with jack stands before working underneath. Never rely solely on a jack, as it can fail, leading to a dangerous situation. Engage the parking brake firmly and consider using wheel chocks for added security.
Confirm the vehicle is stable before loosening any plugs or attempting to access the transmission. A stable platform is paramount for your safety and prevents accidental vehicle movement during the fluid check procedure.
Dealing with Leaks
Identifying the source of any transmission fluid leak is vital; minor leaks may be temporarily managed, but professional repair is often necessary.
Identifying Leak Sources
Pinpointing the origin of a transmission fluid leak requires a careful inspection of the gearbox housing, seals, and surrounding components. Look for wet spots or fluid trails, paying close attention to the input and output shaft seals, the fill and check plugs, and any connecting lines.
Often, leaks stem from worn seals, damaged gaskets, or loose fasteners. A flashlight and a clean rag can aid in locating the precise source. Remember that fluid can travel, so the visible leak may not be the actual origin point; trace it upwards to find the root cause.
Temporary Fixes and Professional Repair
For minor leaks, a transmission stop-leak additive might offer a temporary solution, but it’s not a permanent fix and could mask underlying issues. Addressing the leak promptly is vital.
Significant leaks or those originating from internal components necessitate professional attention. A qualified mechanic can accurately diagnose the problem, replace worn seals or gaskets, and ensure the transmission is properly repaired. Ignoring leaks can lead to severe damage and costly replacements, so don’t delay seeking expert help.
Fluid Change vs. Top-Off
A full fluid change is needed during scheduled maintenance or if the fluid is contaminated; a top-off suffices for minor level adjustments.
When a Full Fluid Change is Needed
A complete manual transmission fluid change is typically recommended during major scheduled maintenance intervals, often coinciding with other significant service milestones. However, circumstances beyond the standard schedule necessitate a full flush. If the existing fluid exhibits signs of severe contamination – metallic particles, a burnt odor, or a milky appearance – immediate replacement is crucial.
Furthermore, if you’ve recently encountered transmission issues like difficult shifting or unusual noises, a fluid change, alongside a thorough inspection, is advisable. Ignoring these signals can lead to irreversible damage and expensive repairs. Consider a full change if the vehicle has experienced heavy use or towing.
When a Top-Off is Sufficient
A simple fluid top-off is generally adequate for minor fluid level discrepancies discovered during routine checks. If the fluid is clean, clear, and at the correct level, but slightly low, replenishing to the specified mark is sufficient. This addresses minor losses due to evaporation or small, undetectable leaks.
However, consistently needing to top-off the fluid indicates a potential leak that requires investigation and repair. A top-off is a temporary solution, not a fix for underlying issues. Monitor the fluid level closely after topping off to confirm leak resolution.

Specific Vehicle Considerations
Porsche 993 models (1993-1998) require specific fluid types and checking procedures; consult the repair manual for accurate fill levels and plug locations.
Porsche 993 (1993-1998) Example
For the Porsche 993, maintaining the correct transmission fluid level is paramount for its renowned performance. Locate the fill and check plugs – often requiring specific wrench sizes due to their placement. The 993 typically uses a GL-4 rated fluid; verify the exact specification in your vehicle’s manual.
When checking, the fluid should be level with the bottom of the fill plug opening. Ensure the vehicle is on a level surface and the transmission is at operating temperature for an accurate reading. Be cautious, as components can be hot!
General Differences Between Makes and Models
Variations in manual transmission fluid checking procedures exist significantly between vehicle manufacturers. Plug locations differ – some are easily accessible, others require under-vehicle access or component removal. Fluid types also vary; always consult your owner’s manual for the correct specification (GL-4, GL-5, etc.).
Furthermore, some vehicles utilize a dipstick for level checking, while others rely solely on the fill/check plug method. Temperature requirements for accurate readings can also differ, impacting the process.
Resources for Further Information
Online forums and vehicle-specific repair manuals offer detailed guidance and troubleshooting tips for checking your manual transmission fluid effectively.
Online Forums and Communities
Engaging with online forums dedicated to your specific vehicle make and model provides a wealth of practical knowledge from experienced owners. These communities often feature detailed threads discussing manual transmission fluid checks, common issues, and helpful tips tailored to your car. Platforms like Rennlist (for Porsche) or dedicated marque-specific forums can be invaluable resources.
Members frequently share their experiences, photos, and even videos demonstrating the process, offering a visual guide alongside written instructions. Don’t hesitate to ask questions – experienced enthusiasts are usually eager to assist, providing personalized advice based on your vehicle’s specifics.
Vehicle-Specific Repair Manuals
Investing in a repair manual specifically for your vehicle is highly recommended. These manuals provide detailed, step-by-step instructions, diagrams, and torque specifications crucial for accurately checking and maintaining your manual transmission. They often include precise locations for fill and check plugs, fluid capacity details, and recommended fluid types.
Unlike generalized guides, vehicle-specific manuals account for unique design variations, ensuring you follow the correct procedure for your car, minimizing the risk of errors and potential damage. Consider both physical and digital versions for convenient access.