
Maintaining your manual transmission’s fluid is crucial for smooth shifting and longevity. Regular checks, utilizing dipsticks or filler plugs, help prevent costly repairs.
Why Checking is Important
Regularly inspecting manual transmission fluid safeguards against premature wear and potential failure of gears and synchronizers. Low fluid levels can cause grinding, difficulty shifting, and ultimately, expensive transmission damage. Monitoring fluid condition—color, smell, and texture—reveals contamination or degradation, enabling timely fluid changes and preserving optimal performance. Proactive checks contribute to a longer transmission lifespan.
Frequency of Checks
Ideally, check your manual transmission fluid every 30,000 miles, or annually, whichever comes first. However, more frequent checks are advisable for vehicles subjected to demanding conditions like towing, off-roading, or aggressive driving. Always inspect before and after long trips to ensure adequate fluid levels and prevent potential issues on the road.

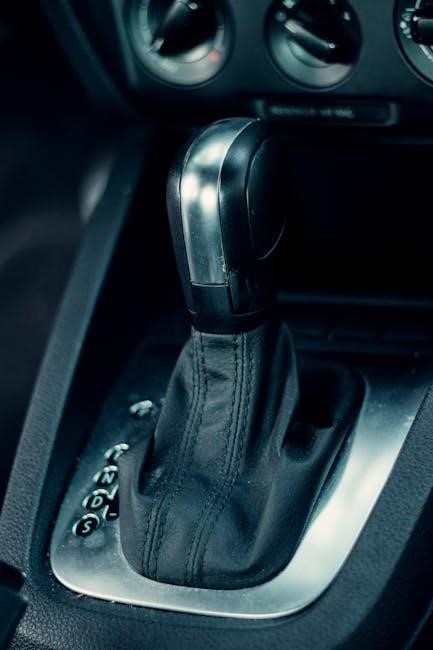
Locating the Transmission Fluid Dipstick
Finding the dipstick varies by vehicle; it’s typically near the transmission, often marked with a yellow or orange handle for easy identification.
Identifying the Dipstick
Locating the manual transmission dipstick requires a bit of searching, as its position isn’t standardized. Look for a brightly colored handle – often yellow or orange – protruding from the transmission casing. Unlike engine oil dipsticks, transmission dipsticks aren’t always easily accessible. Consult your owner’s manual for the precise location specific to your vehicle model, as variations exist significantly between manufacturers and even within the same brand.
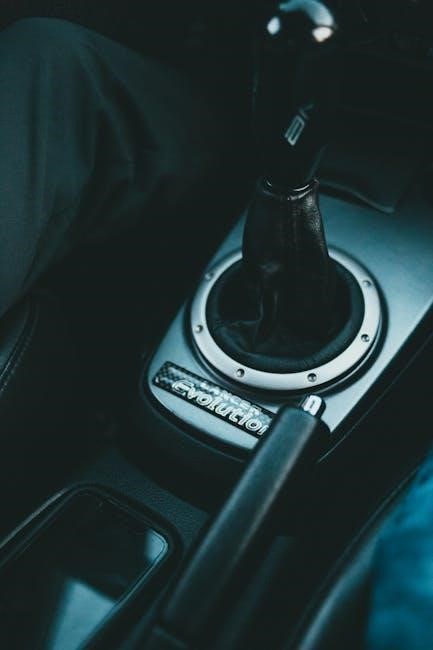
Dipstick Variations by Vehicle
Significant differences exist in dipstick design across vehicles. Some dipsticks feature “hot” and “cold” fluid level markings, dictating when to check the fluid based on engine temperature. Others lack these distinctions, relying on owner’s manual guidance. Furthermore, some vehicles, like certain Honda models, may require a specific dipstick insertion angle for an accurate reading, emphasizing the need for vehicle-specific information.
Preparing to Check the Fluid Level
Ensure the vehicle is on level ground and the engine is at operating temperature for an accurate reading, following your owner’s manual guidance.
Vehicle Leveling Requirements
Accurate transmission fluid level readings depend heavily on a perfectly level vehicle. An uneven surface will cause the fluid to pool, providing a false indication of the actual level. Park on a flat surface – a garage floor is ideal. If outdoors, use a level to confirm the vehicle’s stability before proceeding with the fluid check, as noted in forum discussions.
Engine Temperature Considerations
Checking transmission fluid can be done with the engine either cold or at operating temperature, but it’s vital to follow your vehicle’s specific instructions. Some dipsticks have “cold” and “hot” markings, as Clydes Car Repair highlights. Generally, checking while running and warm provides a more accurate reading, but consult your owner’s manual first.
Checking the Fluid Level – Dipstick Method
Locate, remove, and thoroughly clean the transmission dipstick before reinserting it fully, then check the fluid level against the markings for accuracy.
Removing and Cleaning the Dipstick
Carefully pull the transmission dipstick straight out, noting any instructions printed on its length regarding hot or cold fluid levels. Thoroughly wipe the dipstick clean with a lint-free rag to ensure an accurate reading. Removing all old fluid is essential for a proper assessment of the current level, avoiding misleading results.
Interpreting the Dipstick Markings
Locate the “Full” and “Low” or “Add” markings on the dipstick. The fluid level should ideally fall between these marks. Some dipsticks have separate markings for hot and cold fluid, so consult your owner’s manual. Ensure the vehicle is level for an accurate reading; an incorrect angle yields a false assessment.
Hot vs. Cold Fluid Levels
Checking fluid levels when the engine is at operating temperature often requires a different reading than when cold. Some dipsticks display both “hot” and “cold” fill lines. If instructions aren’t on the dipstick, your owner’s manual will specify whether to check with the engine running or off, impacting the level.
Checking the Fluid Level – Filler Plug Method
Locate the filler plug and carefully remove it with a socket wrench to inspect the fluid level within the transmission housing directly.
Locating the Filler Plug
The filler plug’s location varies by vehicle, but it’s typically found on the side of the transmission case. You’ll need a socket wrench to access it. It’s often positioned lower on the transmission, allowing for a gravity check of the fluid level when removed. Consult your owner’s manual or online resources for the precise location specific to your vehicle model, as it can be challenging to find initially.
Using a Socket Wrench
Once you’ve located the filler plug, select the appropriate size socket wrench. Carefully apply steady pressure to loosen the plug, turning counterclockwise. Be prepared for a small amount of fluid to potentially leak out once fully removed. Ensure the socket fits snugly to avoid rounding off the plug’s edges, making future removal difficult.

Assessing Fluid Condition
Evaluate the fluid’s color and clarity; it should be relatively clean. A foul smell or gritty texture indicates contamination, potentially requiring a fluid change.
Color and Clarity
Healthy manual transmission fluid typically appears clear and amber or light brown. As it ages and accumulates debris, the color darkens, becoming murky or even black. A reddish hue can signal contamination from automatic transmission fluid – a serious issue! Clarity is also key; the fluid shouldn’t appear cloudy or contain visible particles.
Smell and Texture
Fresh manual transmission fluid possesses a slightly petroleum-like odor. A burnt smell indicates overheating and potential damage to the gears. The texture should be smooth and slippery; a gritty or metallic feel suggests internal wear. Changes in smell or texture are critical warning signs requiring immediate attention and potential professional inspection.

Fluid Types for Manual Transmissions
Various fluid specifications exist; Torco MTF is a popular choice for Honda FITs. Always verify compatibility with your vehicle’s owner’s manual before adding fluid.
Common Fluid Specifications
Manual transmissions often require specific fluid types, differing from automatic transmissions. Many Honda and Acura vehicles utilize Honda Genuine MTF, or compatible aftermarket fluids like Torco MTF. Checking your owner’s manual is paramount to identify the correct specification – GL-4 or GL-5 are common classifications. Using the wrong fluid can lead to premature wear, shifting issues, and potential transmission failure, so precision is key.
Compatibility Considerations
Always verify fluid compatibility before adding or changing your manual transmission fluid. While some aftermarket fluids claim compatibility with OEM specifications, cross-referencing is vital. Mixing incompatible fluids can cause chemical reactions, leading to sludge formation and reduced lubrication. Prioritize using fluids specifically designed for manual transmissions and adhere to manufacturer recommendations for optimal performance.

Adding Fluid if Necessary
If the fluid is low, carefully add the recommended quantity – often around 1.5 liters – using a fluid pump to avoid overfilling or contamination.
Recommended Fluid Quantities (e.g., 1.5 Liters)
Determining the precise amount of fluid needed varies by vehicle; however, many manual transmissions require approximately 1.5 liters when topping off. Always consult your owner’s manual for the exact specification. Adding fluid gradually is best, frequently rechecking the level to prevent overfilling, which can be just as detrimental as low fluid levels.
Using a Fluid Pump
A fluid pump simplifies adding transmission fluid, especially when access is limited. Securely attach the pump’s hose to the fluid bottle and the transmission’s fill opening. Pump slowly and steadily, frequently checking the fluid level with the dipstick or filler plug method to avoid overfilling. Clean any spills immediately.

Re-inserting the Dipstick/Filler Plug
Ensure a secure fit by inserting the dipstick to the 10 o’clock position, and tighten the filler plug appropriately to prevent leaks or damage.
Dipstick Insertion Angle (e.g., 10 o’clock position)
Proper dipstick re-insertion is vital for an accurate seal and reading. Online resources, like Reddit’s r/HondaElement, suggest inserting the transmission dipstick with the yellow pull handle facing the 10 o’clock position. This angle ensures it seats correctly within the tube, preventing false readings and potential fluid leaks. Always double-check for a firm fit.
Tightening the Filler Plug
After verifying the fluid level via the filler plug, securely reinstall it. Use a socket wrench to tighten the plug, ensuring it’s snug but avoid over-tightening, which could damage the threads. Consult your vehicle’s repair manual for the specific torque specification to prevent leaks and maintain transmission integrity.
Potential Problems Indicated by Fluid Level
Low fluid levels suggest leaks or consumption, while overfilling can cause aeration and damage. Address these issues promptly to avoid transmission failure.
Low Fluid Levels
Discovering a low fluid level is a significant concern, often indicating a leak within the transmission system. This could stem from seals, gaskets, or even damaged housings. Reduced fluid volume compromises lubrication, leading to increased wear and tear on gears. Ignoring this issue can quickly escalate into costly repairs or complete transmission failure, so prompt investigation and fluid replenishment are vital.
Overfilled Transmission
An overfilled transmission, while seemingly less problematic, can also cause issues. Excess fluid creates increased pressure, potentially forcing seals to fail and leading to leaks. It can also introduce aeration into the fluid, reducing its lubricating properties and causing shifting difficulties. Careful measurement during fluid addition is therefore essential.
Safety Precautions
Always use jack stands when working under a vehicle, and handle transmission fluid with care, as it can be harmful to skin and eyes.
Working Under the Vehicle
Prioritize safety when accessing the transmission. Never rely solely on a jack; always support the vehicle with properly rated jack stands positioned on reinforced frame points. Ensure the vehicle is on a level surface before lifting. Wear safety glasses to protect your eyes from debris, and gloves to shield your skin from potential fluid contact.
Handling Transmission Fluid
Transmission fluid can be harmful; avoid prolonged skin contact and ingestion. Wear nitrile gloves for protection. If fluid spills, clean it up immediately with absorbent materials – do not use water. Dispose of used fluid responsibly at a designated recycling center, adhering to local environmental regulations.
Tools Required for the Check
Essential tools include a socket wrench set for filler plugs and a fluid pump for adding fluid if needed, ensuring a clean and efficient process.
Socket Wrench Set
A comprehensive socket wrench set is vital for accessing the transmission filler plug, allowing you to check the fluid level directly. Ensure the set includes various sizes to accommodate different vehicle specifications. Using the correct size prevents damage to the plug. A ratchet and extension can also aid in reaching recessed plugs, simplifying the inspection process and ensuring accurate fluid level assessment.
Fluid Pump
A fluid pump is incredibly useful when adding transmission fluid, especially if the fill plug isn’t easily accessible. These pumps allow for controlled fluid delivery, minimizing spills and ensuring the correct amount is added – often around 1.5 liters, as noted in online forums. They streamline the refilling process, preventing mess and ensuring accurate fluid levels are achieved.
Resources for Vehicle-Specific Information
Consult your owner’s manual for precise instructions. Online forums, like Honda FIT Forums and Reddit’s r/HondaElement, offer valuable, model-specific advice.
Owner’s Manual
Your vehicle’s owner’s manual is the primary source for accurate transmission fluid checking procedures. It details the specific dipstick location, if equipped, or the filler plug’s position. Crucially, it clarifies whether to check the fluid when cold or hot, and in Park or Neutral. The manual also specifies the correct fluid type and capacity for your particular model, ensuring optimal performance and preventing damage.
Online Forums (e.g., Honda FIT Forums, Reddit)
Vehicle-specific online forums, like Honda FIT Forums and Reddit’s r/HondaElement, offer valuable real-world advice. Members often share detailed experiences, including fluid recommendations (like Torco MTF) and fill quantities (around 1.5 liters). They also discuss proper leveling and dipstick insertion angles – often the 10 o’clock position – for accurate readings.

When to Consult a Professional
If you encounter persistent transmission issues or feel unsure about the checking procedure, seeking guidance from a qualified mechanic is highly recommended.
Persistent Issues
Should you repeatedly find low fluid levels despite adding more, or notice continued difficulty shifting gears after a fluid check, a professional diagnosis is essential. These symptoms could indicate internal leaks within the transmission, or worn synchronizers requiring repair. Ignoring these signs can lead to significant and expensive damage, potentially necessitating a complete transmission overhaul or replacement.
Uncertainty About Procedure
If you’re uncomfortable locating the dipstick or filler plug, interpreting fluid levels, or unsure about the correct fluid type for your vehicle, seek professional assistance. Incorrect procedures can lead to inaccurate readings or even damage to the transmission. Consulting a qualified mechanic ensures the job is done correctly, protecting your investment;